Difference between revisions of "Validation firmware checksum"
| Line 9: | Line 9: | ||
[[File:SFPTotal set checksum.png]] | [[File:SFPTotal set checksum.png]] | ||
| − | When pushed, the program will compare checksum values and highlight the cells with green if the control sum is correct | + | When pushed, the program will compare checksum values and highlight the cells with green if the control sum is correct and red if not. |
| − | + | [[File:SFPTotal validate checksum.png]] | |
To install the correct checksum value in the body of the firmware, click install checksum: | To install the correct checksum value in the body of the firmware, click install checksum: | ||
Revision as of 15:50, 17 November 2015
In the body of the firmware there are two checksum that define data integrity of the firmware body. In the tabs FIRMWARE DETAIL and TABLE checksum bytes have addresses 0x3F and 0x5F.
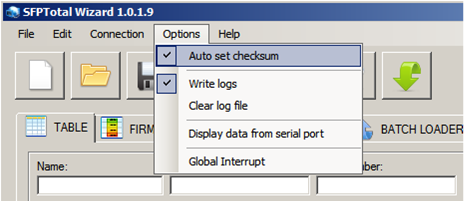
By the default, software automatically recalculates the checksum when you changed the firmware in the tables. To disable the automatic checksum verification, remove the check mark from the menu Options -> Auto set checksum.
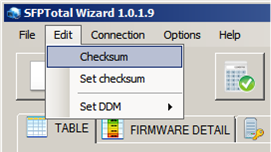
To validate the checksum in the current firmware, you must use the menu item Edit -> Checksum.
When pushed, the program will compare checksum values and highlight the cells with green if the control sum is correct and red if not.
To install the correct checksum value in the body of the firmware, click install checksum:
// Image
After pressing the button of setting the checksum there will be a recalculation of all checksums.
// Image


